Awesome crafts made from plastic packaging. DIY badges for a backpack, how to make key rings from plastic in the oven with your own hands How to make a badge from plastic
Badges are one of the most popular youth accessories. Each such product contains some information about its owner. An icon can tell about personal hobbies, values, musical preferences, affiliation with an organization, or attitude towards life.
There is no doubt that a fancy badge can be bought in a store. But a thing made in a single copy is always a priority. Its value lies in the fact that it is unique. No one else will have one like this! Are you ready to express yourself out loud and show your friends what you are capable of? Then hurry up see how to make badges at home. Some ways will really surprise you!

Making a paper badge
The easiest way to make a badge is to make it out of paper. Paper badges, medals and badges are often used during school Olympiads, sports competitions and children's parties. Young fashionistas also love to create them. And all because making badges from cardboard does not require special materials or special skills. Just paper, a hairpin and a rich imagination!

Cut out from a magazine, print or draw a picture of the desired size. Glue it onto a piece of cardboard. A sticker would also work well as a picture.

To make the badge last longer, cover it with tape on both sides or laminate at any office supply store. You can also add a glossy shine to your icon using wrappers for a notebook. Place the picture between two pieces of wrapper, sealing the edges using an iron and parchment.
That's all! The paper badge for your clothes or favorite bag is ready. A hole punch and a thin rope can easily turn it into a stylish keychain.
Still have questions? The video will show you how to properly make a paper badge and attach a safety pin:
Ice cream and hamburger made. What about cat or cloud keychains? Let's see!
If a special event is approaching - a name day, a family holiday or a children's party, cardboard badges can be easily decorated with lace, sparkles, rhinestones, beads, and satin ribbons.

Paper badge can be covered epoxy glue. Glue the picture printed on thick paper onto a cardboard base and let it dry. Attach the chip to a plasticine stand and apply glue in two stages: first, a thin layer, distributing the glue over the entire area of the picture, then add a few drops of glue - they will spread over the chip and make the icon convex.

How to make plastic badges in the oven?
Oven icons - unexpected, right? But how beautiful! Tell me, where do you put disposable plastic containers for cakes, salads or cookies? Don’t rush to throw them in the trash, it’s better to put them in the oven. Two minutes - and a small miracle will manifest itself.
To make plastic badges in the oven you will need:
- Plastic container,
- scissors,
- hole puncher,
- colored permanent markers.
Using scissors, cut out a smooth and even part of the plastic packaging.

Place the selected design underneath and use a marker to transfer it to the plastic. Paint it over. Make a hole on top with a hole punch and cut out the picture along with the loop, retreating a few millimeters from the edge.
Attention! The pattern should be large enough, because during baking it will shrink several times.


Preheat the oven to 160°C. Place the dough on parchment paper and keep in the oven for 2-3 minutes. As it heats up, the picture will begin to shrink and bend, so you can slightly flatten it with a fork.
Carefully! If you suddenly forget the safety rules while working with a hot oven, you can get seriously burned. Ask adults for help.
After baking, your badge will become strong and smooth. Make several similar badges and put them on a thin metal chain. You can do it wonderful bracelet or cool keychain for a portfolio.


Badges can also be easily made made of plastic buttons. Apply an image or design with acrylic paints and cover with nail polish. Ready!

Masters in making badges manage to cover the plastic base with embroidered designs, tying them at the back with thread. The work is painstaking and requires the use of special tools and the ability to embroider with satin stitch.

Wooden badges are the hit of the season!
Stylish, elegant, and most importantly - environmentally friendly! This is why wooden badges are popular among young people. Do you also want an exclusive mini-brooch? We'll have to work!

To make a wooden badge for clothes, prepare:
- round flat wooden blanks,
- acrylic paints,
- safety pin,
- glue gun,
- simple pencil,
- water and a brush.
Making wooden badges should start with a sketch on paper. You can draw whatever your imagination whispers - ice cream, elephants, bunnies, and so on.

Now, using a simple pencil, transfer the image onto a piece of wood about 5–8 mm thick. They are sold in craft stores.
It’s cool if you know how to work with a chisel, or burn patterns on wood (this is often taught in labor training classes). Then the surface of the icon will become textured, and the contours of the image will be clearer.

Draw your intended image with acrylic paints. Once the paint is completely dry, use a glue gun to attach a safety pin. Cover the badge with wood varnish.
The stylish decoration is ready.


When making wooden badges, additional materials are often used - threads, beads, pieces of fabric.
DIY metal badges
Creative do-it-yourself metal badges are made on the basis of old ones that have already lost their relevance and are not popular with their owner.
To decorate your clothes with a metal badge, prepare:
- old metal badge,
- stationery knife,
- acrylic paints,
- pieces of cloth or napkin.
Take an old iron badge and take it apart using a utility knife.

This is what the workpiece will look like.

Paint the badge with light acrylic paint in two layers. When the paint dries and becomes tacky, cover the badge with a small piece of tissue paper.
Pay attention! If there is too much paint, it will ooze through the napkin and ruin the badge.


Fold the edges of the napkin inward and cover the badge.

The final result depends on the image on the napkin. These could be pirates, heroes of your favorite cartoons or fairy tales...


DIY acrylic badges
These original pins will look like they came straight from a store shelf. To make an acrylic badge with your own hands, you need to purchase a special blank. It can be found in any office supply store.

The workpiece consists of a body and fastening. All you need to do is cut out the image and place it between the base of the badge and the transparent cap. To prevent the image from scrolling, apply a drop of glue to the back side. Everything about everything - one minute!

Congratulations! Now you know not only the technique of making badges, but also how to make a keychain with your own hands. After all, with the help of a hole punch, a wood burning device or a regular soldering iron, the icon can easily turn into a pendant. However, do not forget about the help of adults. Only under their supervision can you work with electrical appliances.


Working with plastic is a pleasure. There are so many ideas that come up with this material, and it’s quite easy to implement them. Take, for example, a keychain for a mobile phone or keys. After all, I want it to be interesting and original, and even better, funny. You can make bright caramel on a stick! Let's take a closer look at how to make a plastic keychain.
Materials required for work:
Plastic 5 colors;
- stationery knife;
- nail polish (if not, then you can take a glossy nail polish, but only transparent);
- scissors;
- 1 toothpick;
- polyethylene file;
- accessories for a keychain.
Progress.
We cover the working surface with a plastic file, it is convenient to work on. Using a utility knife, cut small pieces of plastic of different colors. By the way, choose bright, colorful shades, then the finished product will be tempting and interesting.

We knead the plastic with our hands (you can work with gloves) until it becomes soft and pliable for modeling. From each color of plastic we make a long thin “sausage”.

Then we twist all 5 sausages together and scroll to create a rope.

We twist this rope so that it becomes a little thinner; you can swing the rope a little on the file with your fingers. We cut off the ends, they are still uneven.

Now we make a beautiful curl from multi-colored plastic rope. We twist it in a circle, lightly pressing each new row to the previous one.


The result is such a multi-colored curl.


We pierce the caramel with a special pin. And on the other side we attach a stick - half a toothpick.

Now the plastic needs to be baked. We act according to the instructions on the packaging. In this case, the plastic should be baked in the oven for 20 minutes at 110C. Read what it says on your package, as baking times may vary. Don't forget to line the baking tray with baking paper. It is advisable to periodically check the product in the oven; if you press lightly with a stick and the plastic is not pressed through, then it is ready.
Hi all. With you NataLime and today we will make Tumbler style badges with our own hands, which you can use to decorate a backpack, jacket, bag and anything else. They are quite simple to make and we will need a plastic container. They usually sell all sorts of cookies, cookery, and so on. Well, in order to choose a suitable container, we need to pay attention to the packaging. There should be a PS-06 sign here.
We don't need the ribbed part of the container, so first we cut out the flat part from the container lid. You can use very little plastic from each container. 
Pre-print the pictures that you want to see on your badges. Images must be 3 times larger than the icon size. We apply the plastic to the picture and use a permanent marker to outline everything. 
Try to trace carefully, but even if there are small gaps, it’s okay. They will correct themselves at the next stage. The outline is ready and now we cut out the smiley face with scissors. 
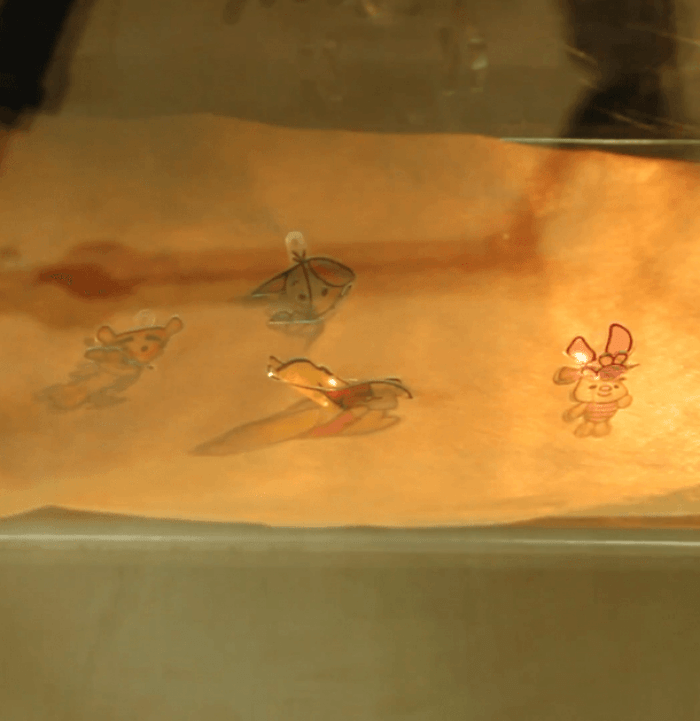
All figures are ready. And now we need a baking sheet, which we previously covered with parchment. Place the figures on it and place in an oven preheated to 180 degrees. What's happening to them? At first they all curl up and it seems that instead of badges you will get plastic tubes, but, fortunately, then they straighten out. We take our pieces out of the oven as soon as they become smooth. The plastic badges decreased in size by about three times, as expected, and the badge became very dense, as if it was made not by me myself, but by professionals at the factory. All the figures turned out great!
Now it's time to breathe life into them with paint! I took acrylic paints and painted each element of the blank from the inside. There is very little left until it is completely ready - glue special pins for badges with hot glue. 

Our icons are ready and now they can decorate and diversify any look. They can be attached to a backpack, jacket, jeans, or anywhere else your heart desires. These icons turned out absolutely amazing. They are bright, youthful, stylish, super-duper cool. I really liked them, and I hope you like them too. making them is not very difficult, but you have to sit for a long time and painstakingly draw everything. And so they are quite easy to make and the result is simply amazing! 
Of all the icons, I liked the inscription Wow, the panda and the palm tree the most. Which icon did you like best? Please write in the comments.
Every housewife strives for ideal cleanliness and order in the house, so all women try to get rid of excess trash as quickly as possible. But you don’t need to be so categorical; for example, plastic food packaging should be saved.
Today we will share with you the secret of creating a charming little thing from plastic containers. Children will be delighted with this idea; by the way, they can be involved in joint production.
YOU WILL NEED
plastic box
scissors
hole puncher
colored permanent markers
PROGRESS
Cut out the bottom of the package. All you need is the flat part of a plastic container. 
Print any outline picture. You can use coloring for these purposes. 
Redraw the picture onto the plastic using permanent markers. Please note that the final size of the figurine will be reduced by approximately 70%. Therefore, initially the drawing should be large. 
Using a hole punch, make a small hole above the design and cut out a plastic figure along the outline. 
After preheating the oven to 165 degrees, place the plastic figures on a baking sheet lined with parchment paper. Bake the figures for exactly 3 minutes. 
After baking, each of the figures will become smooth and denser. Now they can be attached as decoration to the bracelet. 
These figures can also be used as Christmas tree decorations! If you liked this craft idea, share the article with your friends.
My name is Irina, I live in Germany - in a country where absolutely everything is sold in plastic packaging, which migrates in tons from stores to trash cans. I have been doing various types of handicrafts for a long time and am constantly faced with the issue of optimal storage of a bunch of little things that accumulate all the time and require new boxes, caskets, etc. In this master class I want to show several ways to create convenient storage containers from various plastic packaging. The advantage of this kind of containers is that they are easily made at home, they can be made in any size and in any quantity, the transparency of the plastic allows you to quickly find the right thing, the material for containers can be found in every home, such containers for small items can also be used on in the country house, in the garage, etc...
So, first we’ll make the simplest mini-container from a plastic bottle:

We heat the tip of the knife to make it easier to start cutting the bottle. 
Use a knife to cut the bottle into two parts. If the bottle does not have edges, in order to avoid large errors when cutting, glue the tape at the required height and cut the bottle exactly along the edge of the tape.


Let's melt the edges of the bottle a little to avoid cutting your hands during further processing. The bottle should be kept at a distance of 0.5-1 cm from the flame, turning evenly. The unevenness of the edges after heat treatment will hide the crocheting.

We heat up a steel knitting needle and make holes along the edge of the bottle, which will have to fit the size of the hook with which we will tie the edges of the bottle. 


When piercing plastic with a hot knitting needle, sharp and dark traces of plastic often remain on the surface... They can be removed in different ways, I use a regular grater to clean the feet (the emery is too sharp - it damages the surface of the plastic, it’s not very convenient to use a knife) 
Now we proceed to crocheting the edge with a single crochet. 

We thread the tip of the thread and glue it inside the container. 
Then we thread a thick thread into a gypsy needle and sew the entire row with colored thread, without missing a single hole. 

We thread the end of the thread and glue it again. 
If desired, our small container can be decorated. The easiest way to decorate is with double-sided tape, ribbon and rhinestones. You can also use thread winding on double-sided tape.

Cut the tape to the required length and glue it with double-sided tape. We cut off the excess tape. 


We make a bow at the junction, you can stick on a rhinestone and the mini-container is ready! 
We make different containers of the required height and glue them with a gun into a larger and denser plastic package (the photo shows the packaging in which we sell food products) 

Apply hot glue to the bottom and quickly glue the container to the package (hold it a little so that it sets properly) 


We paste double-sided tape, any tape, or wrap it with thread on our box, decorate it with small things, and our first box for small things is ready! I made this box for the dacha to store various little things that you are always looking for in different boxes: pencils, small tools, keys, etc. 
If we make a high strap on our containers from plastic bottles and thread a cord, then we will get pencil cases that can be either placed or hung. They take up little space and are easy to see 


Another option for making boxes for storing small items: in it I used thick plastic cups from Danone yogurt. 
The principle of making a box is the same; if the height of the box allows, you can make two tiers from cups, using cardboard (or thick plastic) for the bottom of the second tier, onto which I hot glued the plastic bottom from the packaging. 

If desired, boxes for small items can be made with lids. For these purposes, I took old plastic folders, cut them to the size of the box and, after making holes with a hole punch or a hot knitting needle, stitched them together with the edge of the plastic box. Since in the photo I have a two-tier plastic box, for convenience I made a handle from scraps of the folder, which I also glued with hot glue to the bottom of the second tier. 


The finishing elements are glued with hot glue. 

Large plastic bottles can be used to make excellent containers for storing small toys, designer parts, etc. for a children's room and kitchen. Decorating such containers can be a joint activity for parent and child. The principle of creating such a large container is exactly the same as shown above. 


From the remaining top parts of plastic bottles we can make a lot of exotic flowers and decorate our balcony or summer cottage with them. But this is a topic for another master class! 


You probably immediately throw them in the trash - the plastic packaging in which we bring home cakes, ready-made salads from the supermarket, cookies... But don’t rush to get rid of them. With this trick you can turn trash into an adorable masterpiece.
Need to:
- plastic box
- scissors
- hole puncher
- colored permanent markers
Let's start:
Take a clean package and cut out the bottom (flat part).
You can choose any picture at your discretion, the main thing is that it is easy to draw. For example, a character from everyone’s favorite cartoon about Winnie the Pooh. Keep in mind that at the end the figure will be reduced by about 70%, which means that the figure will need to be quite large to begin with. We copy the picture onto plastic.

Now we color the picture and use a hole punch to make a hole above the top of the picture. We cut along the contour, grabbing a small “loop” with a hole on top.

Place the plastic piece on baking paper and “bake” for 2-3 minutes at 165 °C. The heat will cause the plastic to shrink and curl, but don't worry, it will straighten out again in the end.

Once baked, the little plastic figurines will not only be smooth, but also thick and sturdy. Now you can use them to make such a charming bracelet.

Once again the whole process will be shown in the video:
Sets of such plastic blanks with drawings are even sold in some children's stores - children are delighted with this transformation. But why spend money if everything is at hand? You can choose any patterns, motifs and colors. Now what was supposed to simply rot in a landfill will be pleasing to the eye for a long time. Beautiful and environmentally friendly!